

vrijdag 14 oktober 2016

donderdag 13 oktober 2016
The real" Blower" !!
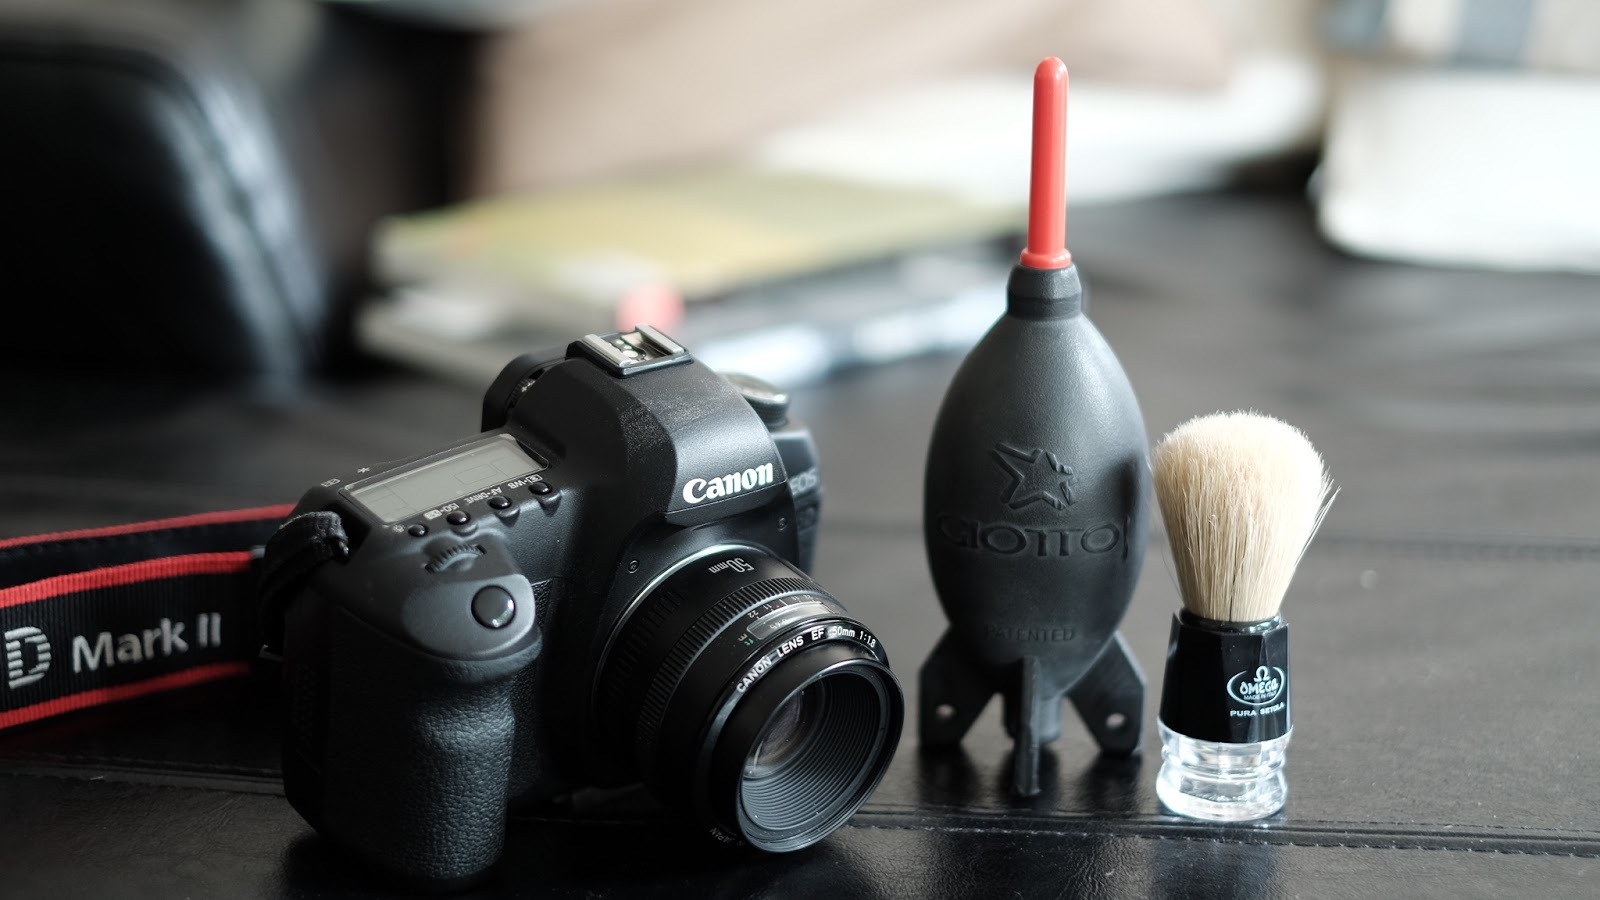
Zoals gezegd, de "Rocketblower", hiermee kan je niet alleen behoorlijk wat lucht mee verplaatsen, MAAR OOK " ROTZOOI" !!!!!Maw, het kan gaan stoffen stuiven in je camerahuis !!!
Gebruik hem persoonlijk om stof/ zandkorrels, ... van de camera /objectief te blazen voraleer ik met n doekje begin (zonder gevaar voor" schuren")!
De scheerkwast is ook handigom je te scheren om wat hardnekkigere deeltjes te lijf te gaan ,
En een microvezeldoekje in je fototas is handig ! ( mocht het wat beginnen miezeren, oh ja, nu ik er aan denk, n paar diepvrieszakjes ( transparant, geen blauwe !!!) en paar elastiekjes om je (toekomstige) flits te beschermen tegen die "fiezelregen " :-)
MAAR nogmaals beter voorkomen dan vermijden!!
Draag zorg voor het "DD" !!
 Raad je trouwens ook aan om de dispay van je camera ( back, top) te " beschermen" met n plastic folie !!! Je kan specifieke folie kopen voor je camera (maar is duur en geloof me niet echt bulletproof ) ik gebruikte gewoon transparant plastiek dat je koopt per rol( om boeken te kaften), Kan alleszins krasjes en vettige neuzen voorkomen ! :-) en gewoon vervangen elke paar maanden ! (
at scheelt in verkoopprijs, mocht je voor die Fullframe gaan !)
Gebruik hem persoonlijk om stof/ zandkorrels, ... van de camera /objectief te blazen voraleer ik met n doekje begin (zonder gevaar voor" schuren")!
De scheerkwast is ook handig
En een microvezeldoekje in je fototas is handig ! ( mocht het wat beginnen miezeren, oh ja, nu ik er aan denk, n paar diepvrieszakjes ( transparant, geen blauwe !!!) en paar elastiekjes om je (toekomstige) flits te beschermen tegen die "fiezelregen " :-)
MAAR nogmaals beter voorkomen dan vermijden!!
Draag zorg voor het "DD" !!
at scheelt in verkoopprijs, mocht je voor die Fullframe gaan !)


Anatomie DSLR( Digital Single Reflex)
ANATOMIE DSLR
1Het licht wordt door de lens het objectief gebundeld en via de spiegel en een (penta)prisma naar de zoeker geleid. De fotograaf ziet het onderwerp dus door het objectief en het beeld in de zoeker komt dus precies overeen met wat er straks op de sensor zal verschijnen.

2.Zodra je op de ontspanner drukt, klapt de spiegel omhoog en zal de sluiter opengaan zodat het beeld op de sensor " valt"
Zodra je op de ontspanner drukt, klapt de spiegel omhoog en zal de sluiter opengaan zodat het beeld op de sensor " valt"

Tot hier komt de werking van een Digitale SLR overeen met die van een analoge( oude) spiegelreflexcamera.( behalve natuurlijk dat het licht dan valt op film ipv een sensor !!
woensdag 12 oktober 2016
AVOID CLIPPING ! ?...
In general....YES !!!
REMEMBER, clipping in the HIGHLIGHTS( rechts in het histogram) is " bye bye informatie !!!"
clipping in the shadows ( links in het histogram) is minder drastisch en in nabewerkinfg kan je eventueel nog wat info terughalen maar vooral ook veel rotzooi !!!!
Dus CORRECT EN RUIM belichten ( expose to the right) is de boodschap !!!!!!
 " CLIPPING" HERKEN JE UITERAARD DOOR JE HISTOGRAM CORRECT TE INTERPRETEREN ( "botsen tegen de linker/rechterkant), en /of de clipping warning op je lcd scherm van je camera ( knipperende lichtjes !)
En uiteraard kan je het ook Checken in Photoshop/Lightroom
In bovenstaand geval dus clipping in the shadows....
Een bewuste keuze aangezien ik de (donkere) voorgrond wou gebruiken om mijn eigenlijke onderwerp ( uitkijktoren + reflectie ) " in te kaderen"
Gebruik maken van een " natural frame" heet dat dan !! ( gebruik maken van aanwezige elementen, laat het nu struiken of n deuropening/ personen zijn, whatever, ....

REMEMBER, clipping in the HIGHLIGHTS( rechts in het histogram) is " bye bye informatie !!!"
clipping in the shadows ( links in het histogram) is minder drastisch en in nabewerkinfg kan je eventueel nog wat info terughalen maar vooral ook veel rotzooi !!!!
Dus CORRECT EN RUIM belichten ( expose to the right) is de boodschap !!!!!!

En uiteraard kan je het ook Checken in Photoshop/Lightroom
In bovenstaand geval dus clipping in the shadows....
Een bewuste keuze aangezien ik de (donkere) voorgrond wou gebruiken om mijn eigenlijke onderwerp ( uitkijktoren + reflectie ) " in te kaderen"
Gebruik maken van een " natural frame" heet dat dan !! ( gebruik maken van aanwezige elementen, laat het nu struiken of n deuropening/ personen zijn, whatever, ....

dinsdag 11 oktober 2016


Objectieven


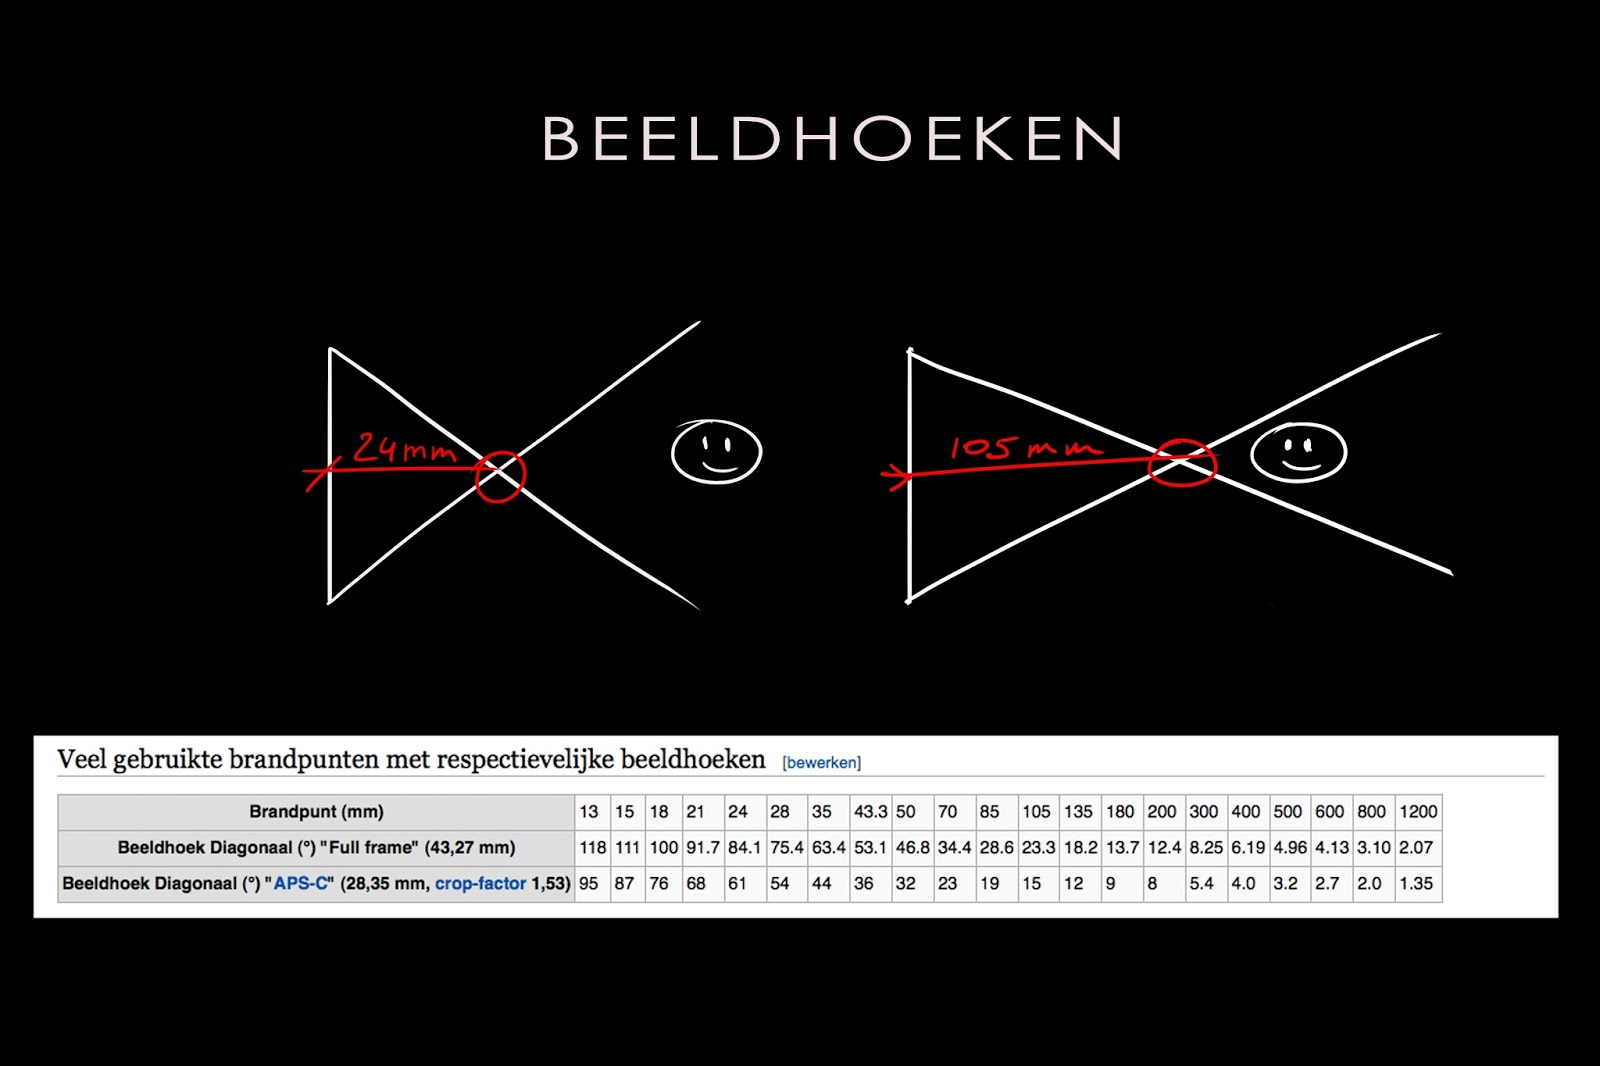


OM EENZELFDE BEELDVULLENDE FOTO TE KUNNEN MAKEN, DIEN JE DICHTERBIJ TE KOMEN NAARMATE DE BRANDPUNTAFSTAND KLEINER IS ! ( eq, met n 24mm objectief dien je veel dichter bij je onderwerp te staan, dan met een 200mm!!) Dus meer vervorming !!!!
GROOTHOEK:
Eerder geschikt om een OMGEVINGSPORTRET te maken !!!
"ideale"( meest flatterende/natuurlijke) brandpuntafstand = ( circa)85mm*
*OP FULL FRAME!!! ( ofte 50mm op je crop-camera !!)


( OOK HIER WEER 50mm op CROP = 50x 1. 6= 80mm)
* afhankelijk van jou smaak / stijl
OOK HIER WEER 50mm op CROP = 50x 1. 6= 80mm
Check " neus" van Teddy groothoek vs 85mm !!


VERGELIJK MAAR DEZE TWEE OPNAMES( EENTJE IS CROP( uitsnede) VAN 24 mm en andere is op 600mm:


vrijdag 7 oktober 2016
Sunny 16!( SIXteen!!)- rule
Old school but still valid !
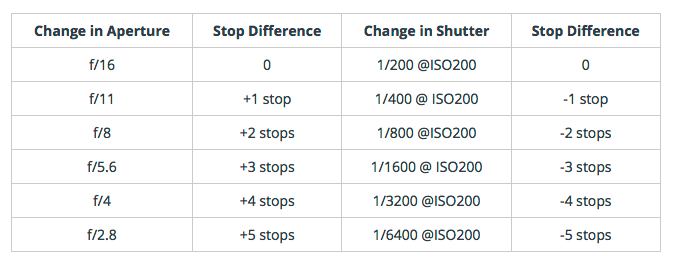
CLEAR SUNNY DAY F16

ADVANTAGES:
- No meter needed
- BASED ON INCIDENT METERING instead of REFLECTIVE METERING
Advantage: which means that it’s based on the brightness of the light only, and not how the light that is being reflected off the subject and into the camera.
OTHER WEATHER CONDITIONS

OTHER APERTURE VALUES
Succes ! Greyscale om een ( beter/correcter) zicht te krijgen p je scherm
UIteraard niets zo goed als een scherm dat regelmatig gecalibreerd wordt... maar in afwachting...
Bedoeling is dat je alle tonen ( van wit naar zwart) kan onderscheiden op je scherm, zoniet dan staat oftewel je scherm te donker of te licht, oftewel zit je niet recht voor je scherm en/ of dien je de positie van je scherm iets te veranderen
Van sommige mensen heb ik inmiddels vernomen dat de drie donkerste blokjes "versmolten" zijn tot eenzelfde donkere massa!?
Uiteraard kan je op deze manier verre van goed gaan nabewerken !
voor de mensen die Lightroom gebruiken, Je kan de LIGHTROOM IDENTITY PLATE vervangen door de greyscale afbeelding
Voor de overigen, plaats de greyscale gewoon op je desktop/bureaublad en " bekijk het even" !
PS. Als je bovenstaande tekst niet kan lezen, dan is het hoog nodig dat je dit leest !!!
Succes !
Luc
Default

Customized

IDENTITY PLATE Greyscale that shows you the tonal changes from white to black in 19 stages. Basically, it allows you to check that you’re seeing all the tones that you want to be seeing. Why? Many of us are often working on a laptop, a small shift in viewpoint (or the angle at which we’re viewing our screen) can totally change the way the colors and tones look.
- In the Identity Plate Editor, select one of the following:
- Use A Styled Text Identity Plate
- Uses the text you enter in the box with the font characteristics that you specify in the menus below the box.
(Mac OS) To create a multiline text identity plate, press Option+Return in the text box. Lightroom displays just the first line of an identity plate to the left of the Module Picker. However, all lines appear when the identity plate is selected as an output overlay in the Slideshow, Print, or Web module.
- Use A Graphical Identity Plate
- Uses a graphic that is no more than 57 pixels high (Mac OS) or 46 pixels high (Windows) that you drag into the box. The graphic can be a BMP, JPG, GIF, PNG, or TIFF (Windows) or JPG, GIF, PNG, TIFF, PDF, or PSD (Mac OS). The resolution of graphical identity plates may be too low for printed output.

COME AND CHECK MY LAPTOP !!!
CHECK YOUR MAILBOX

Abonneren op:
Posts (Atom)